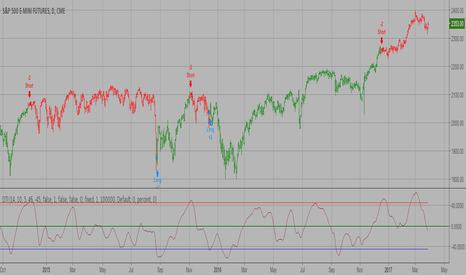
Directional Movement Index + Average Directional IndexPersonal DMI and ADX script
ADX color change from positive vs negative momentum
DMI Color fill based on DMI+/- positive momentum
No fill color during lack of momentum
חפש סקריפטים עבור "adx"
Apirine Slow Candlestick RSI [ChuckBanger]This is just a candle stick version of Apirine Slow RSI. The yellow line is Apirine Slow RSI with the option to set an offset to it to filter out nice. RSI oscillating between 0 and 100. And whats good with Apirine version is it generates both OB/OS signals and midline (50) cross over signals and divergences. As author suggests, bullish/bearish divergences generated by the indicator are not as effective during strong trends. To avoid fading an established trend, the system is used in conjunction with a trend confirmation tool like ADX indicator.
The script spits out red and green diamonds as a potential long and short signals when the yellow line crosses close of the RSI candles. And combine it with trend confirmation tool like ADX, and if you apply it correctly. You have a very robust trading system. Good luck traders
DAX Shooter 5M StrategyThis is a simple strategy that applies very well for scaling indices to 5 minutes especially for the DAX. The algorithm provides for buying or selling when the market is very "pulled". The rules are as follows:
you buy when:
1- The ADX indicator with the standard settings is greater than 32.
2- the RSI indicator set to 7 periods is crossing upwards the oversold line at 30
3- the candle minimum is lower than the lower band of bollinger bands set to 50 periods.
is sold when:
1- ADX indicator with standard settings is greater than 32.
2 - the RSI indicator set to 7 periods is crossing downwards the overbought line at 70
3- the maximum of the candle is higher than the upper band of the bollinger bands set to 50 periods.
Money management is at the discretion of the trader but usually it is better to set a fixed stop loss and a take profit on reaching the opposite bollinger band.
Enjoy trading at all!
90009If( MDI(14)>40 AND ADX(14)>40 AND PDI(14)<15 AND RSI(14)<30,1,0)
;If( MDI(14)<15 AND ADX(14)<15 AND PDI(14)>40 AND RSI(14)>70,-1,0)
Ultimate RSI with VWMA and ADX ( Hamza ŞAHİN )LuxAlgo'nun yeni mütiş indikatörünü HAHO indikatörü ile kombine ederek hazırladım sizdeğerli kullanıcılarıma sunuyorum
Enhanced Professional Strategy with SupertrendThis Pine Script, designed for advanced traders, integrates a variety of sophisticated technical indicators and risk management tools to generate accurate buy and sell signals. The strategy combines multiple layers of market analysis to provide insights into price momentum, volatility, trend strength, and market sentiment.
Key Features:
Comprehensive Indicator Suite:
RSI (Relative Strength Index): Identifies oversold and overbought market conditions.
MACD (Moving Average Convergence Divergence): Tracks momentum and crossovers for trend direction.
Bollinger Bands: Measures volatility and identifies potential breakouts or reversals.
ADX (Average Directional Index): Evaluates the strength of the trend.
Stochastic Oscillator: Detects overbought and oversold levels for additional precision.
CCI (Commodity Channel Index): Highlights price deviations from its average.
VWAP (Volume Weighted Average Price): Helps confirm directional bias.
Supertrend: Adds a dynamic trend-following layer to filter buy and sell decisions.
Dynamic Sentiment Analysis:
Utilizes Bollinger Band width and volume spikes to approximate market fear and greed, enabling sentiment-driven trading decisions.
Trailing Stop-Loss:
Automatically manages risk by locking in profits or minimizing losses with dynamic trailing stops for both long and short positions.
Signal Visualization:
Clear visual cues for buy and sell signals are plotted directly on the chart using triangles, enhancing decision-making at a glance.
Bollinger Bands and Supertrend lines are plotted for added clarity of market conditions.
Customizable Parameters:
Fully adjustable inputs for all indicators, allowing traders to fine-tune the strategy to suit different trading styles and market conditions.
Alert System:
Integrated alerts notify traders in real time of new buy or sell opportunities, ensuring no trade is missed.
How It Works:
Buy Signal: Generated when the market shows oversold conditions, low sentiment, and aligns with a confirmed upward trend based on Supertrend and VWAP.
Sell Signal: Triggered when the market exhibits overbought conditions, high sentiment, and aligns with a confirmed downward trend.
This strategy combines technical, trend-following, and sentiment-driven methodologies to provide a robust trading framework suitable for equities, forex, or crypto markets.
Use Case:
Ideal for traders seeking to leverage a combination of indicators for precise entry and exit points, while managing risks dynamically with trailing stops.
Disclaimer: Past performance does not guarantee future results. This script is for educational purposes and should be used with proper risk management.
Bull Market ScreenerPrice above 50-day SMA True
50-day SMA above 200-day SMA True
RSI Between 50 and 70
ADX Above 20
Volume Above 20-day average
Earnings Growth (Quarterly) > 10%
Revenue Growth (Yearly) > 10%
P/E Ratio (optional) < 30
Crypto Market Trend Analysis This indicator is a multi-asset market analysis tool that evaluates trends, RSI, and confluence across various assets, providing actionable insights into the current market conditions. It calculates a score and trend signals for multiple assets, including DXY, USDT dominance, BTC, BTC dominance, TOTAL market cap, and specific altcoins like HBAR and its pairings.
Key Features:
Multi-Asset Analysis:
Analyzes multiple metrics such as DXY, BTC, TOTAL market caps, and specific altcoins.
Provides a clear breakdown of trend directions (Bull/Bear), RSI values, and previous conditions for each asset.
Custom Scoring System:
Calculates a score for each asset using a weighted system based on:
Moving averages (37 and 200-period).
RSI thresholds (e.g., >60 for bullish, <40 for bearish).
Relative Volume (RVOL).
ADX values for trend strength.
Bullish and bearish divergences detected using RSI and price.
The score categorizes the trend into five levels:
Strong Bull: High bullish confidence.
Bull: Moderately bullish conditions.
Neutral: Mixed or undecided market state.
Bear: Moderately bearish conditions.
Strong Bear: High bearish confidence.
RSI-Based Trend Insights:
Evaluates whether RSI is trending higher or lower, combining this with price and volume metrics to strengthen trend detection.
Divergence Detection:
Identifies bullish divergences when prices make lower lows while RSI makes higher lows.
Identifies bearish divergences when prices make higher highs while RSI makes lower highs.
Confluence Across Metrics:
Combines individual asset scores to provide a comprehensive view of market sentiment and strength across key assets.
For example:
If BTC and TOTAL both show bullish trends with rising RSI, the market-wide confluence suggests stronger confidence in the bullish scenario.
Visualization:
Displays clear metrics such as trend direction, RSI values, and their corresponding previous states in a visually organized table format.
Color coding (e.g., green for bullish, red for bearish) enhances readability.
Directional Volume IndexDirectional Volume Index (DVI) (buying/selling pressure)
This index is adapted from the Directional Movement Index (DMI), but based on volume instead of price movements. The idea is to detect building directional volume indicating a growing amount of orders that will eventually cause the price to follow. (DVI is not displayed by default)
The rough algorithm for the Positive Directional Volume Index (green bar):
calculate the delta to the previous green bar's volume
if the delta is positive (growing buying pressure) add it to an SMA, else add 0 (also for red bars)
divide these average deltas by the average volume
the result is the Positive Directional Volume Index (DVI+) (vice versa for DVI-)
Differential Directional Volume Index (DDVI) (relative pressure)
Creating the difference of both Directional Volume Indexes (DVI+ - DVI-) creates the Differential Directional Volume Index (DDVI) with rising values indicating a growing buying pressure, falling values a growing selling pressure. (DDVI is displayed by default, smoothed by a custom moving average)
Average Directional Volume Index (ADVX) (pressure strength)
Putting the relative pressure (DDVI) in relation to the total pressure (DVI+ + DVI-) we can determine the strength and duration of the currently building volume change / trend. For the DMI/ADX usually 20 is an indicator for a strong trend, values above 50 suggesting exhaustion and approaching reversals. (ADVX is not displayed by default, smoothed by a custom moving average)
Divergences of the Differential Directional Volume Index (DDVI) (imbalances)
By detecting divergences we can detect situations where e.g. bullish volume starts to build while price is in a downtrend, suggesting that there is growing buying pressure indicating an imminent bullish pullback/order block or reversal. (strong and hidden divergences are displayed by default)
Divergences Overview:
strong bull: higher lows on volume, lower lows on price
medium bull: higher lows on volume, equal lows on price
weak bull: equal lows on volume, lower lows on price
hidden bull: lower lows on volume, higher lows on price
strong bear: lower highs on volume, higher highs on price
medium bear: lower highs on volume, equal highs on price
weak bear: equal highs on volume, higher highs on price
hidden bear: higher highs on volume, lower highs on price
DDVI Bands (dynamic overbought/oversold levels)
Using Bollinger Bands with DDVI as source we receive an averaged relative pressure with stdev band offsets. This can be used as dynamic overbought/oversold levels indicating reversals on sharp crossovers.
Alerts
As of now there are no alerts built in, but all internal data is exposed via plot and plotshape functions, so it can be used for custom crossover conditions in the alert dialog. This is still a personal research project, so if you find good setups, please let me know.
Buy Low Sell High Composite Upgraded V6 [kristian6ncqq]NOTICE: This script is an upgraded and enhanced version of the original "Buy Low Sell High Composite" indicator by (published in 2017).
The original script provided a composite indicator combining multiple technical analysis metrics such as RSI, MACD, and MFI.
Why I Republished This Script
I found the original indicator to be exceptionally useful for identifying optimal accumulation zones for stocks or assets when prices are low (red area) and potential profit-taking zones when prices are high (green area).
To ensure it remains accessible and functional for modern trading strategies, I have updated and enhanced the original version with additional features and flexibility.
Intended Use
This indicator is designed for traders and investors looking to:
Accumulate stocks or assets when the price is in the low (red) zone.
Take profits or reduce positions when the price is in the high (green) zone.
The composite score provides a clear visualization of multiple technical indicators combined into a single actionable signal.
Enhancements in This Version
Updated to Pine Script v6 (from version 3).
Added input parameters for key settings (e.g., RSI length, MACD parameters, smoothing).
Introduced Chande Momentum Oscillator (CMO) and directional ADX for improved trend detection.
Implemented slope-based trend coloring for outer edges to highlight significant changes in trend direction.
Enhanced visualizations with customizable thresholds and smoothing for improved usability.
Credits
Original script: "Buy Low Sell High Composite" by , 2017.
URL to the original script: Buy Low Sell High Composite.
This script is designed to build upon the strengths of the original while adding flexibility and new features to meet the needs of modern traders.
Fancy Oscillator Screener [Daveatt]⬛ OVERVIEW
Building upon LeviathanCapital original RSI Screener (), this enhanced version brings comprehensive technical analysis capabilities to your trading workflow. Through an intuitive grid display, you can monitor multiple trading instruments simultaneously while leveraging powerful indicators to identify market opportunities in real-time.
⬛ FEATURES
This script provides a sophisticated visualization system that supports both cross rates and heat map displays, allowing you to track exchange rates and percentage changes with ease. You can organize up to 40 trading pairs into seven customizable groups, making it simple to focus on specific market segments or trading strategies.
If you overlay on any circle/asset on the chart, you'll see the accurate oscillator value displayed for that asset
⬛ TECHNICAL INDICATORS
The screener supports the following oscillators:
• RSI - the oscillator from the original script version
• Awesome Oscillator
• Chaikin Oscillator
• Stochastic RSI
• Stochastic
• Volume Oscillator
• CCI
• Williams %R
• MFI
• ROC
• ATR Multiple
• ADX
• Fisher Transform
• Historical Volatility
• External : connect your own custom oscillator
⬛ DYNAMIC SCALING
One of the key improvements in this version is the implementation of dynamic chart scaling. Unlike the original script which was optimized for RSI's 0-100 range, this version automatically adjusts its scale based on the selected oscillator.
This adaptation was necessary because different indicators operate on vastly different numerical ranges - for instance, CCI typically ranges from -200 to +200, while Williams %R operates from -100 to 0.
The dynamic scaling ensures that each oscillator's data is properly displayed within its natural range, making the visualization both accurate and meaningful regardless of which indicator you choose to use.
⬛ ALERTS
I've integrated a comprehensive alert system that monitors both overbought and oversold conditions.
Users can now set custom threshold levels for their alerts.
When any asset in your monitored group crosses these thresholds, the system generates an alert, helping you catch potential trading opportunities without constant manual monitoring.
em will help you stay informed of market movements and potential trading opportunities.
I hope you'll find this tool valuable in your trading journey
All the BEST,
Daveatt
Bollinger Breakout Strategy with Direction Control [4H crypto]Bollinger Breakout Strategy with Direction Control - User Guide
This strategy leverages Bollinger Bands, RSI, and directional filters to identify potential breakout trading opportunities. It is designed for traders looking to capitalize on significant price movements while maintaining control over trade direction (long, short, or both). Here’s how to use this strategy effectively:
How the Strategy Works
Indicators Used:
Bollinger Bands:
A volatility-based indicator with an upper and lower band around a simple moving average (SMA). The bands expand or contract based on market volatility.
RSI (Relative Strength Index):
Measures momentum to determine overbought or oversold conditions. In this strategy, RSI is used to confirm breakout strength.
Trade Direction Control:
You can select whether to trade:
Long only: Buy positions.
Short only: Sell positions.
Both: Trade in both directions depending on conditions.
Breakout Conditions:
Long Trade:
The price closes above the upper Bollinger Band.
RSI is above the midline (50), confirming upward momentum.
The "Trade Direction" setting allows either "Long" or "Both."
Short Trade:
The price closes below the lower Bollinger Band.
RSI is below the midline (50), confirming downward momentum.
The "Trade Direction" setting allows either "Short" or "Both."
Risk Management:
Stop-Loss:
Long trades: Set at 2% below the entry price.
Short trades: Set at 2% above the entry price.
Take-Profit:
Calculated using a Risk/Reward Ratio (default is 2:1).
Adjust this in the strategy settings.
Inputs and Customization
Key Parameters:
Bollinger Bands Length: Default is 20. Adjust based on the desired sensitivity.
Multiplier: Default is 2.0. Higher values widen the bands; lower values narrow them.
RSI Length: Default is 14, which is standard for RSI.
Risk/Reward Ratio: Default is 2.0. Increase for more aggressive profit targets, decrease for conservative exits.
Trade Direction:
Options: "Long," "Short," or "Both."
Example: Set to "Long" in a bullish market to focus only on buy trades.
How to Use This Strategy
Adding the Strategy:
Paste the script into TradingView’s Pine Editor and add it to your chart.
Setting Parameters:
Adjust the Bollinger Band settings, RSI, and Risk/Reward Ratio to fit the asset and timeframe you're trading.
Analyzing Signals:
Green line (Upper Band): Signals breakout potential for long trades.
Red line (Lower Band): Signals breakout potential for short trades.
Blue line (Basis): Central Bollinger Band (SMA), helpful for understanding price trends.
Testing the Strategy:
Use the Strategy Tester in TradingView to backtest performance on your chosen asset and timeframe.
Optimizing for Assets:
Forex pairs, cryptocurrencies (like BTC), or stocks with high volatility are ideal for this strategy.
Works best on higher timeframes like 4H or Daily.
Best Practices
Combine with Volume: Confirm breakouts with increased volume for higher reliability.
Avoid Sideways Markets: Use additional trend filters (like ADX) to avoid trades in low-volatility conditions.
Optimize Parameters: Regularly adjust the Bollinger Bands multiplier and RSI settings to match the asset's behavior.
By utilizing this strategy, you can effectively trade breakouts while maintaining flexibility in trade direction. Adjust the parameters to match your trading style and market conditions for optimal results!
Support, Resistance, MA, and ADXSummary
This comprehensive script provides traders with a tool that highlights critical levels of support and resistance, detects significant price breakouts with volume confirmation, identifies potential reversals with wick analysis, and plots a moving average that changes color based on trend strength as indicated by the ADX. It is useful for spotting entry and exit points, confirming breakouts, and identifying trend direction and strength.
Sash Trending Suite NEWWhy
The " Sash Trending Suite " (STS) indicator simplifies trading by highlighting market trends and potential reversals. In a world of complex charts and overwhelming data, STS helps traders quickly understand market direction and make informed decisions.
---
How and What
STS combines key technical tools into one easy-to-read indicator, directly showing important signals on the chart:
Macro Trend Detection
How : Uses two EMAs (fast and slow) and the ADX to identify strong bullish or bearish trends.
What to Look For :
Bar Colors :
Green Bars : Indicate a strong upward (bullish) trend.
Red Bars : Indicate a strong downward (bearish) trend.
Benefit : Quickly see the overall market direction.
Alpha Track Line
How : An adaptive EMA that acts as a dynamic support or resistance line.
What to Look For :
Line Colors :
Green Line : Price is above the line (bullish momentum).
Red Line : Price is below the line (bearish momentum).
Benefit : Visualize momentum shifts easily.
Reversal Signals
How : Combines RSI with price action to spot potential market reversals.
What to Look For :
"R" Labels :
Turquoise "R" Below Bar : Potential bullish reversal.
Amber "R" Above Bar : Potential bearish reversal.
Benefit : Identify possible turning points for entry or exit.
Micro Trend Detection
How : Uses shorter EMAs to catch minor trend changes.
What to Look For :
Small Circles :
Green Circle Below Bar : Micro bullish signal.
Red Circle Above Bar : Micro bearish signal.
Benefit : Spot short-term trend shifts promptly.
Alerts
How : Built-in alerts notify you of key events.
What to Expect :
Trend Changes : Alerts when a new bullish or bearish trend starts.
Reversals : Alerts for potential bullish or bearish reversals.
Benefit : Stay updated without constantly watching the chart.
---
Summary
The "Sash Trending Suite" provides:
Simplified Analysis : One indicator shows trend direction, momentum, reversals, and micro trends.
Clear Visuals : Color-coded bars and symbols make interpretation easy.
Timely Alerts : Know about important market changes instantly.
By focusing on essential signals and displaying them clearly, STS helps traders navigate the market with confidence and simplicity.
FMS Suite [KFB Quant]FMS Suite
Overview
The FMS Suite is a powerful and adaptive trend and momentum analysis tool that leverages multiple technical indicators to deliver a comprehensive signal for market direction. This suite combines the strengths of the Aroon, DMI, RSI, Supertrend, and Trix indicators, offering traders a well-rounded perspective on market trends.
How It Works
The FMS Suite integrates five essential components to assess market behavior:
Aroon Indicator : Detects trend strength and direction by analyzing the frequency of recent highs and lows over multiple timeframes. Directional Movement Index (DMI) : Measures the direction and strength of trends, with an ADX component for better trend assessment. Relative Strength Index (RSI) : Evaluates market momentum by indicating overbought or oversold conditions, with signals derived from the 50-line. Supertrend : Utilizes ATR-based volatility measures to establish dynamic support and resistance levels, signaling potential trend changes. Trix : A triple-smoothed EMA oscillator that highlights trend reversals using rate-of-change dynamics.
Each component is calculated across three separate timeframes (fast, medium, and slow), which are then averaged to produce a final FMS Signal . Users can also apply signal smoothing to reduce noise and enhance clarity.
Key Features
Customizable Parameters : Adjust the lengths for each component (fast, medium, slow) to optimize the indicator's responsiveness to different markets. Signal Smoothing Options : Select from various smoothing methods, including SMA, EMA, DEMA, and WMA, to fine-tune the FMS signal. Visual Representation : The FMS Suite plots a histogram representing the raw signal and a smoother line for clearer trend visualization. The background color shifts dynamically to indicate long, short, or neutral conditions. Threshold-Based Alerts : Set your own long and short thresholds, tailoring the indicator to your trading strategy and market outlook. Informative Table Display : An integrated table provides an at-a-glance summary of the current FMS and smoothed FMS signals, along with their respective scores and market state.
How to Use
Trend Confirmation : Utilize the FMS histogram and smoothed signal to validate or challenge existing trend assumptions. Trade Entries and Exits : Identify potential buy (long) or sell (short) signals based on the relationship between the FMS signal and predefined thresholds. Strategy Customization : Fine-tune the indicator settings to align with your trading style, whether it’s short-term scalping or long-term trend following.
Important Considerations
Not Predictive : The FMS Suite does not predict future price movements and should be used in conjunction with other analysis methods. It is based on historical price data, and past performance is not indicative of future results. Settings and Backtesting : Experiment with different lengths and smoothing techniques to optimize performance for specific instruments and market conditions. Always backtest thoroughly.
Disclaimer: This tool is provided for informational and educational purposes only and should not be considered as financial advice. Always conduct your own research and consult with a licensed financial advisor before making any investment decisions.
*2.2 Aggregated (Raw Z-scores with MA)***To be used with other 2.2 indicator***
Key Indicators Used:
Oscillating Indicators: RSI, TSI, Stochastic, MACD, CCI, Vortex Indicator, Williams %R.
Perpetual Trend Indicators: EMA, ADX, Parabolic SAR, Supertrend, Donchian Channel, Ichimoku Cloud, RVGI.
How to Use the Indicator:
Raw Z-Score (Blue Line): This represents the real-time aggregated Z-score of all the indicators. It shows how far the current market conditions are from their average, helping you identify trends.
Moving Average of Z-Score (Orange Line): A smoothed version of the Z-score that helps confirm trends and eliminate noise.
Shaded Area: The area between the Z-score and its moving average is shaded green if the Z-score is above the moving average (bullish), and red if below the moving average (bearish).
Zero Line (Gray Line): Serves as a reference point. A Z-score crossing above zero could signal a bullish market, while crossing below zero could indicate bearish conditions.
This indicator helps in identifying market extremes and trend reversals by combining various technical indicators into a single aggregate score, ideal for spotting overbought or oversold conditions and possible trend shifts
*2.2 Aggregate Signal Indicator (trial)How to Use the Indicator:
Trend Detection:
The aggregate trend score will plot above 0 for bullish conditions and below 0 for bearish conditions.
When the trend score is green, it indicates a positive (bullish) trend, while red indicates a negative (bearish) trend.
Visual Representation:
The blue line represents the aggregate trend score, while the grey line at 0 shows the neutral point.
The area between the trend score and the 0-line is filled with green (bullish) or red (bearish) based on the score's direction.
Confirming Trends:
Look for consistency in the trend score remaining above or below 0 to confirm a lasting trend.
Use this indicator alongside other trading strategies to filter out false signals and gain confirmation of market direction.
Customizable Inputs:
The indicator allows you to customize the settings for each individual indicator (e.g., lengths for EMA, ADX, RSI, MACD, etc.) to fine-tune the system to your preference or specific market conditions.
mlivsLibrary "mlivs"
TODO: add library description here
adx(high, low, adxlen, dilen)
TODO: add function description here
Parameters:
high (float)
low (float)
adxlen (simple int)
dilen (simple int)
Returns: TODO: add what function returns
adxMA()
impulseMACD(lengthMA, lengthSignal)
Parameters:
lengthMA (simple int)
lengthSignal (int)
Optimized Comprehensive Analysis Table# Enhanced Comprehensive Analysis Table
This advanced indicator provides a holistic view of market sentiment by analyzing multiple technical indicators simultaneously. It's designed to give traders a quick, at-a-glance summary of market conditions across various timeframes and analysis methods.
## Key Features:
- Analyzes 9 popular technical indicators
- Weighted voting system for overall market sentiment
- Customizable indicator weights
- Clear, color-coded table display
## Indicators Analyzed:
1. MACD (Moving Average Convergence Divergence)
2. RSI (Relative Strength Index)
3. Moving Averages (50, 100, 200-period)
4. Stochastic Oscillator
5. Parabolic SAR
6. MFI (Money Flow Index)
7. CCI (Commodity Channel Index)
8. OBV (On Balance Volume)
9. ADX (Average Directional Index)
## How It Works:
Each indicator's signal is calculated and classified as bullish, bearish, or neutral. These signals are then weighted according to user-defined inputs. The weighted votes are summed to determine an overall market sentiment.
## Interpretation:
- The table displays the state of each indicator and the overall market sentiment.
- Green indicates bullish conditions, red bearish, and yellow neutral.
- The "Overall State" row at the bottom provides a quick summary of the combined analysis.
## Customization:
Users can adjust the weight of each indicator to fine-tune the analysis according to their trading strategy or market conditions.
This indicator is ideal for traders who want a comprehensive overview of market conditions without having to monitor multiple indicators separately. It's particularly useful for confirming trade setups, identifying potential trend reversals, and managing risk.
Note: This indicator is meant to be used as part of a broader trading strategy. Always combine with other forms of analysis and proper risk management.
DMI ForLoop [InvestorUnknown]Overview
This indicator utilizes the Directional Movement Index (DMI) combined with a for-loop to provide a robust trend analysis (ADX is not a part of this indicator).
Settings
DMI ForLoop Settings:
Start Length (a): The initial length for DMI calculation (inclusive).
End Length (b): The final length for DMI calculation (inclusive).
EMA Length (c): The length for the Exponential Moving Average applied to the DMI values, in order so smoothen the signal.
Signal Settings:
Signal Mode: Determines the mode of signal calculation. Options are "Fast", "Slow", "Thresholds Crossing", and "Fast Threshold". Default is "Fast".
1. Slow: is a simple crossing of the midline (0).
2. Fast: positive signal depends if the current "DMIema" is above "DMIema " or above 0.99, otherwise the signal is negative.
3. Thresholds Crossing: simple ta.crossover and ta.crossunder of the user defined threshold for Long and Short.
4. Fast Threshold: signal changes if the value of "DMIema" changes by more than user defined threshold against the current signal.
// Slow
dmicol1 = DMIema > 0 ? colup : coldn
// Fast
dmicol2 = DMIema > DMIema or DMIema > 0.99 ? colup : coldn
// Thresholds Crossing
var color dmicol3 = na
if ta.crossover(DMIema,longth)
dmicol3 := colup
if ta.crossunder(DMIema,shortth)
dmicol3 := coldn
// Fast Threshold
var color dmicol4 = na
if (DMIema > DMIema + fastth)
dmicol4 := colup
if (DMIema < DMIema - fastth)
dmicol4 := coldn
color dmicol = na
if sigmode == "Slow"
dmicol := dmicol1
if sigmode == "Fast"
dmicol := dmicol2
if sigmode == "Thresholds Crossing"
dmicol := dmicol3
if sigmode == "Fast Threshold"
dmicol := dmicol4
else
na
Functionality
The DMI ForLoop indicator calculates an array of DMI values over a specified range of lengths, then averages these values and applies an EMA for smoothing. The result is a dynamic trend indicator that adapts to market conditions.
DMI Calculation:
The indicator iterates through lengths from Start Length to End Length, calculating the positive and negative directional movement (DM) for each period and calculates the average of all the signals at the end. A custom function version of the DMI is used here in order to use DMI with "series" inputs.
// Function to calculate an array of DMI values over a range of lengths
DMIArray(a, b, c) =>
// Initialize an array to store DMI values, with size based on the range (b - a + 1)
var dmiArray = array.new_float(b - a + 1, 0.0)
// Loop through each length from a to b
for x = 0 to (b - a)
// Calculate the smoothing factor alpha for the current length
alpha = 1.0 / (a + x)
// Initialize variables for positive and negative DM
float plus = na
float minus = na
// Calculate the up and down movements
up = ta.change(high)
down = -ta.change(low)
// Determine the positive DM (plusDM)
plusDM = na(up) ? na : (up > down and up > 0 ? up : 0)
// Determine the negative DM (minusDM)
minusDM = na(down) ? na : (down > up and down > 0 ? down : 0)
// Calculate the smoothed positive DM using either SMA or EMA
plus := na(plus ) ? ta.sma(plusDM, (a + x)) : alpha * plusDM + (1 - alpha) * nz(plus )
// Calculate the smoothed negative DM using either SMA or EMA
minus := na(minus ) ? ta.sma(minusDM, (a + x)) : alpha * minusDM + (1 - alpha) * nz(minus )
// Determine the trend direction: 1 for positive trend, -1 for negative trend, 0 for no trend
trend = plus > minus ? 1 : plus < minus ? -1 : 0
// Store the trend value in the DMI array
array.set(dmiArray, x, trend)
// Calculate the average of the DMI array
dmiAvg = array.avg(dmiArray)
// Apply an EMA to the average DMI value
DMIema = ta.ema(dmiAvg, c)
// Return the DMI array, its average, and the EMA of the average
// Call the DMIArray function with the input parameters and assign the results to variables
= DMIArray(a, b, c)
This indicator is versatile and can be tailored to fit various trading/investing strategies by adjusting the input parameters and signal modes.
[blackcat] L2 Trend Mirror Navigator TypeIIn this unpredictable world of trading, the L2 Trend Mirror Navigator TypeI is like a magical mirror, reflecting the market's pulse and potential turning points. This indicator is not just a game of numbers; it's a visual feast that reveals the market's deep secrets through five colorful lines (mb1, mb2, mb3, mb4, mb5). Imagine these lines as five lively little snakes, dancing on the chart, intertwining and separating at times, with each crossing potentially signaling a shift in market sentiment.
The calculation process of this indicator is like cooking a complex dish, requiring precise ingredients and火候 (heat control). First, we take the average of the high, low, and close prices, which serves as our "basic soup base." Then, we add the secret ingredient of Exponential Moving Average (EMA) to smooth out the price data, like adding a layer of delicate cream to the soup base. Next, through a series of complex calculations, we obtain five lines, each like a different dish with its own flavor, but together they form a bountiful trading feast.
In practical application, this indicator acts as your trading assistant, telling you the market's dynamics through lines of different colors. When the red line (mb2) is above the green line (mb3), it's like saying, "Hey, the market is rising!" Conversely, it warns you, "Be careful, the market might be falling." You can adjust the sensitivity of this indicator based on the length of the EMA period, just like adjusting the spiciness of a dish to suit your taste.
Now, let's explore how to combine this indicator with others to enhance the reliability of trading signals. Imagine you're observing a stock or currency pair, looking for the best time to buy or sell. You can combine the L2 Trend Mirror Navigator TypeI with Moving Averages (MA) or Average Directional Index (ADX), just like adding some herbs and spices to a dish to enrich the flavor. When the RSI indicator shows the market may be oversold, it's like telling you, "Now might be a good time to buy." And price behavior analysis serves as a reminder, "Watch out, the market might be forming a certain chart pattern."
Finally, don't forget the key factor of volume. It's like the salt in a dish; without it, everything becomes bland. Analyzing the signals of the L2 Trend Mirror Navigator across different time frames is like admiring a painting under different lights, each angle revealing a different beauty.
Stochastic Levels on Chart [MisterMoTA]The values of the Stochastic Levels on Chart indicator are calculated using Reverse Engineering calculations starting from default Stochastic formula : 100 * (close - lowest(low, length)) / (highest(high, length) - lowest(low, length)).
I added options for users to define the Extreme Overbought and Oversold values, also simple Oversold and Overbought values of the stochastic, default Extreme Overbought at 100, Extreme Oversold at 0, the 20 for Oversold and 80 as Overbought, plus the middle stochastic level = 50.
The script has included a color coded 20 SMA that will turn red when the 20 SMA is falling and green when it is rising, also there are bollinger bands using 2 standard deviation plus an extra top and bottom bollinger bands with a 2.5 standard deviation.
The users can use Stochastic Levels on Chart along with a simple Stochastic or a Stochastic Rsi indicator, when the price on chart touching extreme levels and Stochastic or Stochastic Rsi K line crossing above or bellow D line users can see on chart the levels where price need to close for getting stochastic overbought or oversold.
In the demo chart we can see at daily stochastic crossed down and the price crossed down all the levels displayed on chart, and same before stochastic was crossing up from oversold and price crossed up the stochastic levels displayed on chart.
In strong bullish moves the Extreme level 100 of the stochastic will be pushed higher, same in a strong bearish move the Extreme Oversold 0 level will be pushed lower, so users need to wait for confirmation of a crossover between K and D lines of stochastic that will signalize a pullback or a reverse of the trend.
For better results you will need to add a dmi or an adx or other indicator that will show you trend strength.
If you have any questions or suggestions to improve the script please send me a PM.
DIY Custom Strategy Builder [ZP] - v1DISCLAIMER:
This indicator as my first ever Tradingview indicator, has been developed for my personal trading analysis, consolidating various powerful indicators that I frequently use. A number of the embedded indicators within this tool are the creations of esteemed Pine Script developers from the TradingView community. In recognition of their contributions, the names of these developers will be prominently displayed alongside the respective indicator names. My selection of these indicators is rooted in my own experience and reflects those that have proven most effective for me. Please note that the past performance of any trading system or methodology is not necessarily indicative of future results. Always conduct your own research and due diligence before using any indicator or tool.
===========================================================================
Introducing the ultimate all-in-one DIY strategy builder indicator, With over 30+ famous indicators (some with custom configuration/settings) indicators included, you now have the power to mix and match to create your own custom strategy for shorter time or longer time frames depending on your trading style. Say goodbye to cluttered charts and manual/visual confirmation of multiple indicators and hello to endless possibilities with this indicator.
What it does
==================
This indicator basically help users to do 2 things:
1) Strategy Builder
With more than 30 indicators available, you can select any combination you prefer and the indicator will generate buy and sell signals accordingly. Alternative to the time-consuming process of manually confirming signals from multiple indicators! This indicator streamlines the process by automatically printing buy and sell signals based on your chosen combination of indicators. No more staring at the screen for hours on end, simply set up alerts and let the indicator do the work for you.
Available indicators that you can choose to build your strategy, are coded to seamlessly print the BUY and SELL signal upon confirmation of all selected indicators:
EMA Filter
2 EMA Cross
3 EMA Cross
Range Filter (Guikroth)
SuperTrend
Ichimoku Cloud
SuperIchi (LuxAlgo)
B-Xtrender (QuantTherapy)
Bull Bear Power Trend (Dreadblitz)
VWAP
BB Oscillator (Veryfid)
Trend Meter (Lij_MC)
Chandelier Exit (Everget)
CCI
Awesome Oscillator
DMI ( Adx )
Parabolic SAR
Waddah Attar Explosion (Shayankm)
Volatility Oscillator (Veryfid)
Damiani Volatility ( DV ) (RichardoSantos)
Stochastic
RSI
MACD
SSL Channel (ErwinBeckers)
Schaff Trend Cycle ( STC ) (LazyBear)
Chaikin Money Flow
Volume
Wolfpack Id (Darrellfischer1)
QQE Mod (Mihkhel00)
Hull Suite (Insilico)
Vortex Indicator
2) Overlay Indicators
Access the full potential of this indicator using the SWITCH BOARD section! Here, you have the ability to turn on and plot up to 14 of the included indicators on your chart. Simply select from the following options:
EMA
Support/Resistance (HeWhoMustNotBeNamed)
Supply/ Demand Zone ( SMC ) (Pmgjiv)
Parabolic SAR
Ichimoku Cloud
Superichi (LuxAlgo)
SuperTrend
Range Filter (Guikroth)
Average True Range (ATR)
VWAP
Schaff Trend Cycle ( STC ) (LazyBear)
PVSRA (TradersReality)
Liquidity Zone/Vector Candle Zone (TradersReality)
Market Sessions (Aurocks_AIF)
How it does it
==================
To explain how this indictor generate signal or does what it does, its best to put in points.
I have coded the strategy for each of the indicator, for some of the indicator you will see the option to choose strategy variation, these variants are either famous among the traders or its the ones I found more accurate based on my usage. By coding the strategy I will have the BUY and SELL signal generated by each indicator in the backend.
Next, the indicator will identify your selected LEADING INDICATOR and the CONFIRMATION INDICATOR(s).
On each candle close, the indicator will check if the selected LEADING INDICATOR generates signal (long or short).
Once the leading indicator generates the signal, then the indicator will scan each of the selected CONFIRMATION INDICATORS on candle close to check if any of the CONFIRMATION INDICATOR generated signal (long or short).
Until this point, all the process is happening in the backend, the indicator will print LONG or SHORT signal on the chart ONLY if LEADING INDICATOR and all the selected CONFIRMATION INDICATORS generates signal on candle close. example for long signal, the LEADING INDICATOR and all selected CONFIRMATION INDICATORS must print long signal.
The dashboard table will show your selected LEADING and CONFIRMATION INDICATORS and if LEADING or the CONFIRMATION INDICATORS have generated signal. Signal generated by LEADING and CONFIRMATION indicator whether long or short, is indicated by tick icon ✔. and if any of the selected CONFIRMATION or LEADING indicator does not generate signal on candle close, it will be indicated with cross symbol ✖.
how to use this indicator
==============================
Using the indicator is pretty simple, but it depends on your goal, whether you want to use it for overlaying the available indicators or using it to build your strategy or for both.
To use for Building your strategy: Select your LEADING INDICATOR, and then select your CONFIRMATION INDICATOR(s). if on candle close all the indicators generate signal, then this indicator will print SHORT or LONG signal on the chart for your entry. There are plenty of indicators you can use to build your strategy, some indicators are best for longer time frame setups while others are responsive indicators that are best for short time frame.
To use for overlaying the indicators: Open the setting of this indicator and scroll to the SWITCHBOARD section, from there you can select which indicator you want to plot on the chart.
For each of the listed indicators, you have the flexibility to customize the settings and configurations to suit your preferences. simply open indicator setting and scroll down, you will find configuration for each of the indicators used.
I will also release the Strategy Backtester for this indicator soon.